
Edit Mode
The routing tab can operate in two modes: View Mode and Edit Mode).
Switch between these two modes by clicking the toggle switch at the bottom of the routing tab.
Edit Mode is used to manage connections between DisplayNet Sources and Destinations. While View Mode is used to see where devices are currently routed.
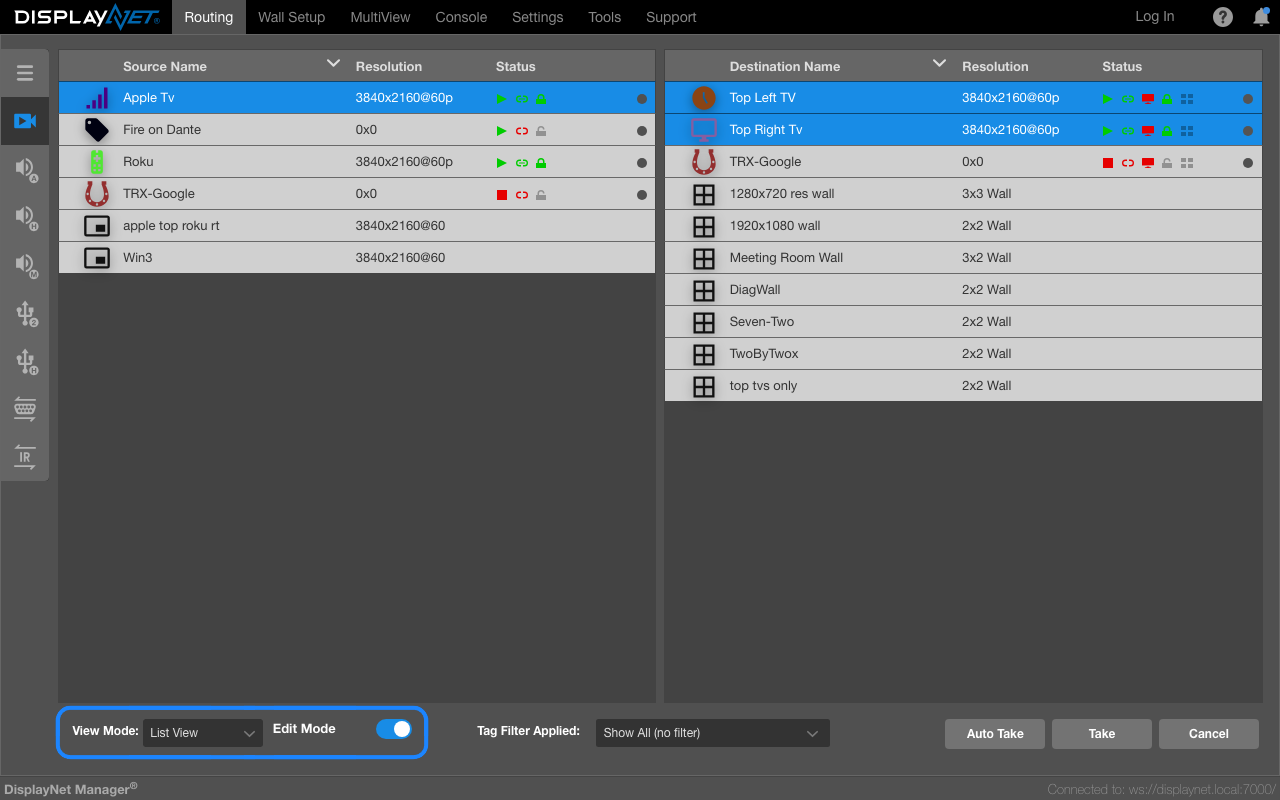
Examples of Routing in Edit Mode
Navigate to the Routing Tab and set the Routing Tab to Edit Mode and select the Video Layer by using the sidebar navigation on the left.
- Click on a Source device. (The selected Source will be highlighted blue. Any Destination devices already connected to the selected Source will be highlighted blue as well.)
- Click on the desired Destination. (The selected Destinations device row will be highlighted light blue.)
- Click the "Take" button located in the bottom right corner of the window.
The video signal (and embedded audio) from the Source device will be sent to the Destination device.
Please see Managing Wall Configurations for a description of saved wall configuration rows as they behave slightly differently than normal Destination rows.
To send video from one Source to multiple Destinations, the process is similar.
Navigate to the Routing Tab and set the Routing Tab to Edit Mode and select the Video Layer by using the sidebar navigation on the left.
- Click on a Source device. (The selected Source will be highlighted blue. Any Destination devices already connected to the selected Source will be highlighted blue as well.)
- Click on each of the desired Destination devices. (The selected Destinations device rows will be highlighted light blue.)
- Click the "Take" button located in the bottom right corner of the window.
The video signal from the selected Source will be sent to all the selected Destinations.
To send video from a Source device to a Wall, again, the process is similar
Navigate to the Routing Tab and set the Routing Tab to Edit Mode and select the Video Layer by using the sidebar navigation on the left.
- Click on a Source device
- Click on the desired Wall
- Click the "Take" button located in the bottom right corner of the window.
During any one of the above operations, a destination device may be deselected by clicking on the destination again prior to clicking "Take." The deselected destination will no longer be highlighted. Additionally, a pending routing may be aborted by clicking the "Cancel" button prior to clicking "Take." The "Cancel" button is only accessible while in Take Mode.
While configuring a route, it is still possible to view the device settings as well as navigate elsewhere in the software. This is useful for when settings must be double-checked prior to performing the routing.