
Take versus AutoTake Mode
Taking, is the process of routing a selected Source to one or more selected Destinations.
DisplayNet Manager offers two modes for taking:
- Take Mode
- Auto Take Mode
Auto Take Mode only allows for a single Source to be joined to a single Destination at once. In Auto Take Mode, to connect a single Source to multiple Destinations, these routings must be performed one-by-one for each Destination. In contrast, Take Mode allows a single Source to be routed to multiple Destinations with a single routing operation.
Routing Using List View
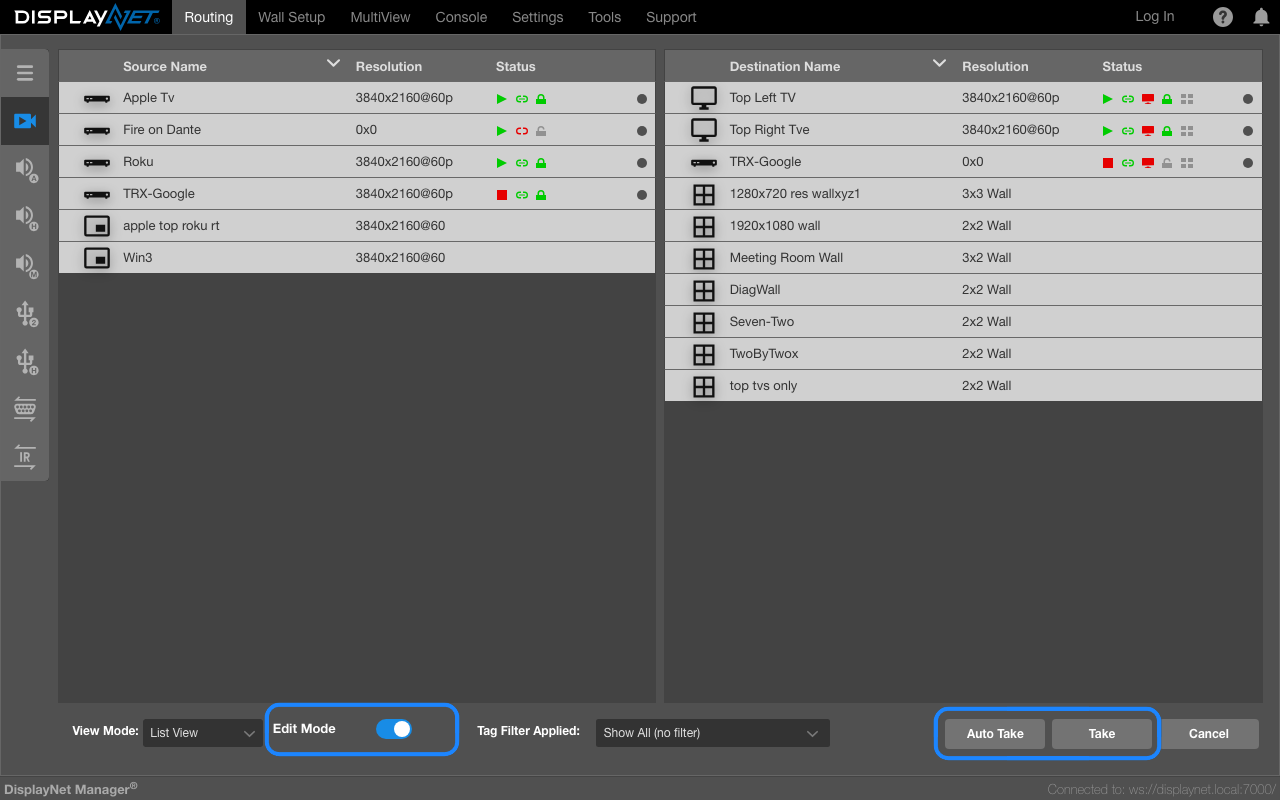
Take mode is where the user selects a source and one or more destinations and then clicks the "Take" button to perform the routing from the source to the destination(s).
"Take Mode" is the default mode for the List View.
Routing Using List View Via Take Mode
To route a Source to a Destination in Take Mode:
- Choose a layer to route by selecting the specific routing layer in the left sidebar navigation.
- Ensure Edit Mode is enabled by toggling on the "Edit Mode" toggle.
- Select a Source by clicking on the Source device row. The selected Source device row will be highlighted. If any previous routings exist, the destination device rows will also be highlighted.
- Select one or more Destinations by clicking on the desired Destination's device row. The selected Destination device row will be highlighted.
- The "Take" button triggers the routing of the active stream. Note, the "Cancel" button, which resets the device row selection status, can only be used while in Take Mode before the "Take" button has applied the routing.
Routing Using List View Via Auto Take Mode
Auto Take Mode permits the user to perform routing more quickly than in Take Mode.
Auto Take Mode in List View, is where the user selects a source and one or more destinations and the routing is performed immediately without the need to click the "Take" button.
- Choose a layer to route by selecting the specific routing layer in the left sidebar navigation.
- Ensure "List View" is selected in the View Mode dropdown.
- Ensure "Edit Mode" is enabled by toggling on the "Edit Mode" toggle.
- Click the "Auto Take" near the bottom right of the List View to toggle Auto Take Mode on. When this mode is active, the button is blue. When this mode is inactive, the button is gray.
- Select a Source by clicking on the desired Source's device row. The selected Source device row will be highlighted.
- Select a Destination by clicking on the desired Destination's device row.
The routing from the selected Source to the clicked Destination will be performed immediately.
Unrouting Using List View
To unroute a Destination from a Source, right-click the Destination row and select the appropriate option from the context menu.
For the video layer, the context menu will include the option "Leave Video Source" while the USB layer will include the option "Remove Pairing".
Routing Using Matrix View
Routing Using Matrix View Via Take Mode
Routing Using Matrix View Via Auto Take Mode
- Choose a layer to route by selecting the specific routing layer in the left sidebar navigation.
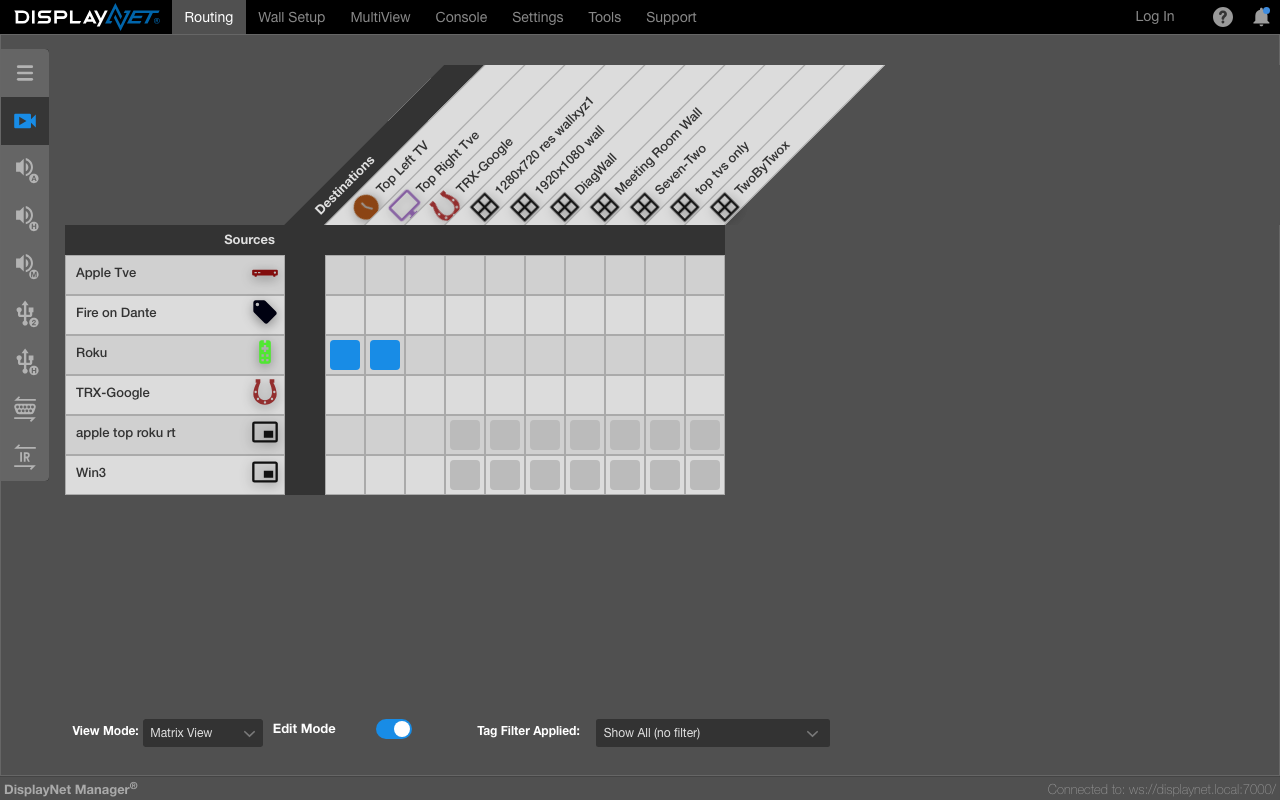
- Ensure "Matrix View" is selected in the View Mode dropdown.
- Ensure "Edit Mode" is enabled by toggling on the "Edit Mode" toggle. Note, "Auto Take Mode" is always enabled in "Matrix View" while in "Edit Mode".
- Select a box corresponding to the source on the left side of the matrix and the destination on the top of the matrix.
The routing from the Selected Source and Destination will be performed immediately.
Unrouting Using Matrix View
Perform the same steps above as in "Routing Using Matrix View Via Auto Take Mode" except that you will click on a box that is already selected/routed.
This will unroute the source from the destination immediately.