Preset Scripts
Preset Scripts are a feature of DisplayNet Server that allows users to generate and save scripts of DisplayNet API commands. The script can then be saved, modified, and named, to be later executed.
Preset Scripts are managed in the Preset Library.
The Script Editor
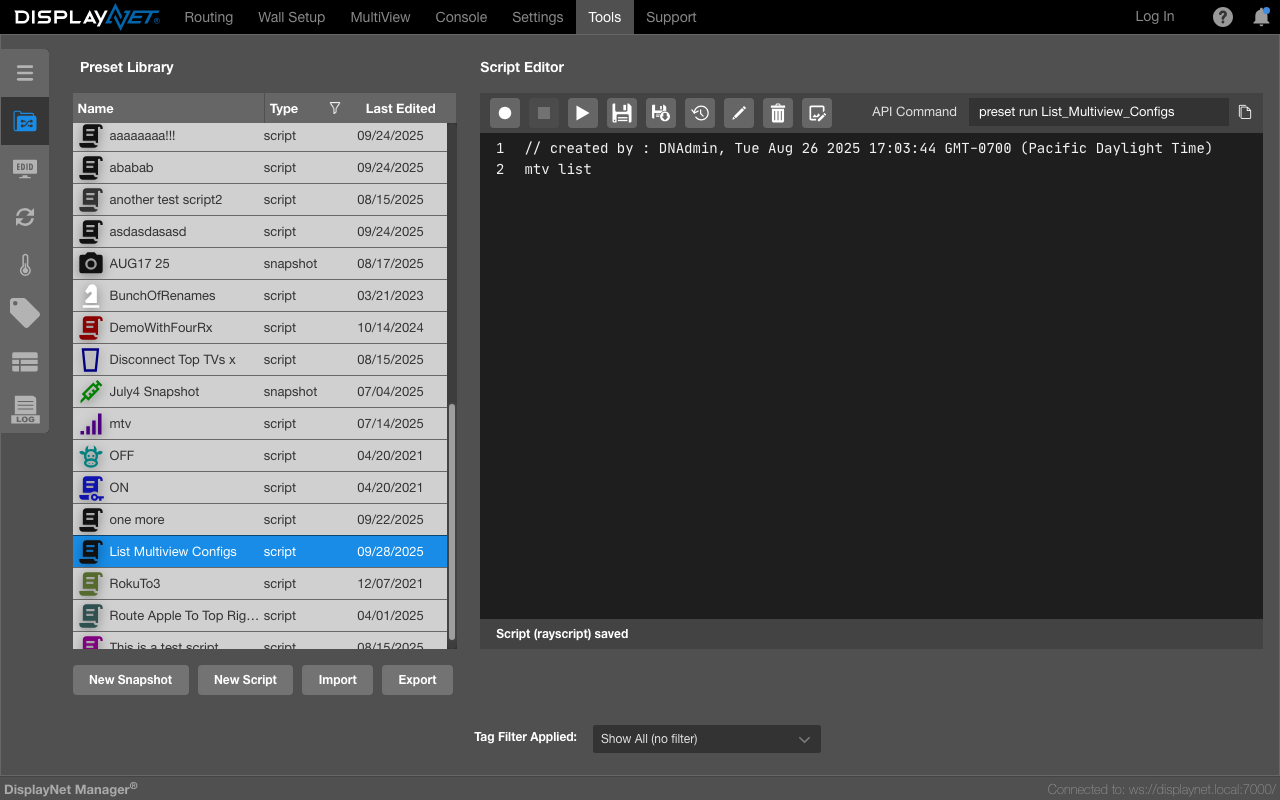
The Script Editor button bar

Left to right, the items are:
- Record Script - Records DisplayNet API commands as they are executed in DisplayNet Server.
- Stop Running Script - Sends a stop command to DisplayNet Server to stop the currently running script.
- Run Script - Runs the currently loaded script on DisplayNet Server.
- Save Script - Saves the script to the Preset Library on DisplayNet Server.
- Save Script As - Saves the script to the Preset Library on DisplayNet Server with a new name.
- Script History - Opens the Script History window.
- Rename Script - Renames the script in the Preset Library on DisplayNet Server.
- Delete Script - Deletes the script from the Preset Library on DisplayNet Server.
- Change Script Icon - Opens the icon customization modal to select a custom icon and color for the script. See Icon Customization for details.
- API Command - This displays the DisplayNet API command that will be executed when the script is run.
- Copy API Command Icon - Copies the API command to the clipboard which can be run in the DisplayNet Console to execute this script.
Creating a script
- Open the Preset Library.
- Click the "New Script" button to create a new script.
- Enter a name for the script and click "OK". This script will now be saved in the Preset Library on DisplayNet Server.
Now, we are put into the Script Editor window. Here, we can add, edit, and delete DisplayNet API commands to create a script.
Recording a script
- Click the "Record Script" button in the Script Editor window. This will start recording DisplayNet API commands as they are executed in DisplayNet Server.
Note the screen is bordered in maroon to indicate that the script is being recorded and the "Stop Recording Script" button is available at the top right of the screen.
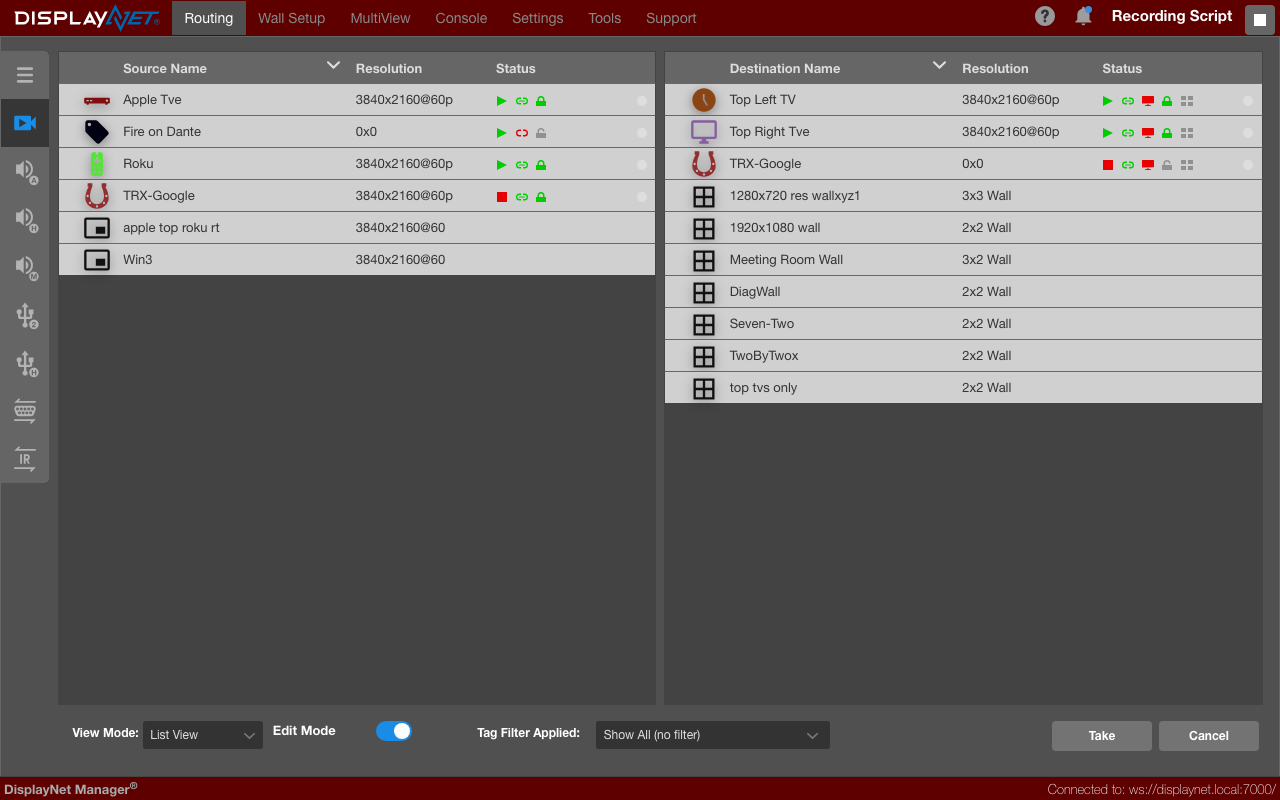
- Perform the desired actions in DisplayNet Manager. You can click any part of DisplayNet Manager's interface, including the "Tools Tab", "Device Tab", "Wall Tab", and "System Tab". Any DisplayNet API commands that are executed will be recorded.
- Click the "Stop Recording" button at the top right of the screen.
- The script will now automatically save.
Editing a script
- Open the Preset Library.
- Select the desired script from the Preset Library.
- This will open the Script Editor window with the selected script loaded.
- Edit the script as desired.
- Click the "Save" button to save the script.
- Items in the Script Editor starting with // are comments and will not be executed when the script is run.
Copying a script
- Open the Preset Library.
- Select the desired script from the Preset Library.
- Click the "Save Script As" button and enter the new script's name. This will save the currently selected script as a new script with the new name entered.
Viewing a script's history
- Open the Preset Library.
- Select the desired script from the Preset Library.
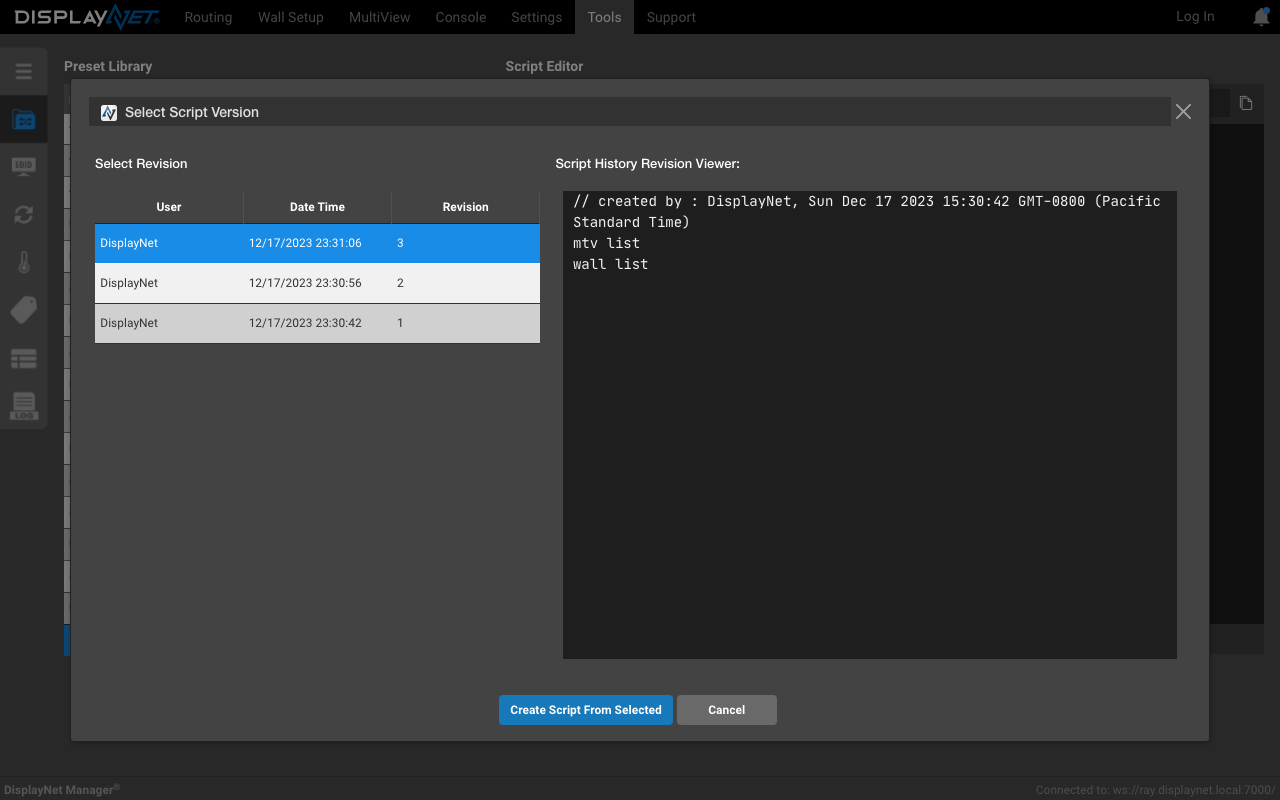
- Click the "Script History" button. If the script has a saved history loaded, this will open the Script History window.
- The Script History window will show saved versions of the script. Clicking on a saved version and then clicking the "Create Script From Selected" will create a new script from that version of the script into the Preset Library
Renaming a script
- Open the Preset Library.
- Select the desired script from the Preset Library.
- Click the "Rename Script" button. This will open the Rename Script window.
- Enter the new name for the script and click "OK". This will rename the script in the Preset Library on DisplayNet Server.
- The script will now be renamed.
Running a saved script
- Open the Preset Library.
- Select the desired script from the Preset Library.
- Click the "Run Script" button. This will run the currently selected script on DisplayNet Server.
- The script will run and the results will be displayed in the Script History window.
- If the script is currently running, the "Stop Running Script" button will be available at the top of the Script Editor. Clicking this button will send a stop command to DisplayNet Server to stop the currently running script.
Deleting a script
- Open the Preset Library.
- Select the desired script from the Preset Library.
- Click the "Delete Script" button. This will delete the currently selected script from the Preset Library on DisplayNet Server.
- A confirmation window will appear. Click "OK" to confirm the deletion.
- The script will be deleted from the Preset Library on DisplayNet Server.
- Note that this action cannot be undone.
Importing and exporting scripts
The Import and Export buttons allow users to import and export scripts from DisplayNet Server. They are located on the bottom left of the Preset Library window.
Exporting a script will save the script as a .txt file that can be imported into another DisplayNet Server installation. Importing a script will import a .txt file into the Preset Library on DisplayNet Server.
To export a script
- Open the Preset Library.
- Select the desired script from the Preset Library.
- Click the "Export" button. This will open a file browser window.
- Browse to the desired location and enter a name for the script. Click "Save". This will save the script as a .txt file to the selected location.
- The script will now be saved as a .txt file.
- This file can be imported into another DisplayNet Server installation.
To import a script
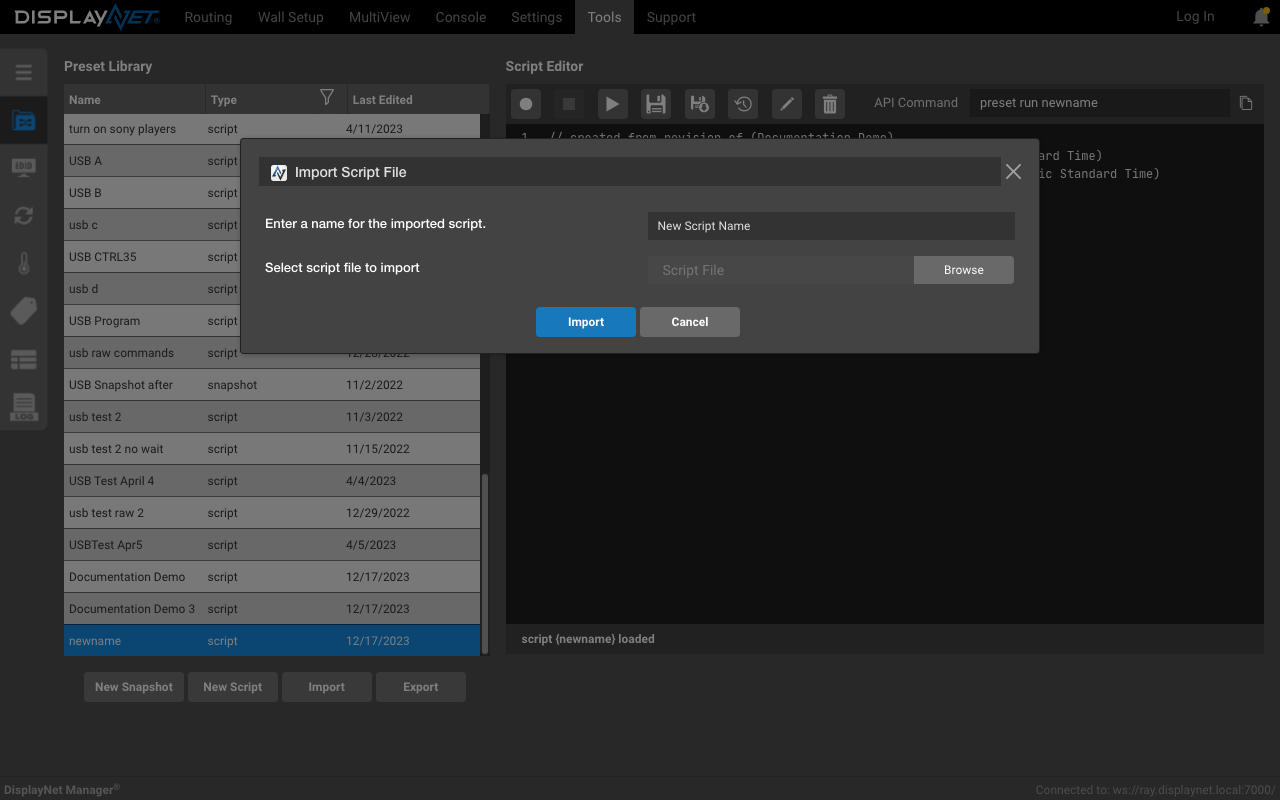
- click the "Import" button
- Browse and select the .txt file to import from your computer.
- Enter the new name for the script and click "OK". This will import the script into the Preset Library on DisplayNet Server.