
Managing Wall Configurations
Creating a Wall Configuration
To create a wall:
- Navigate to the Wall Setup Tab
- Click the "New" button in the upper left part of the left sidebar.
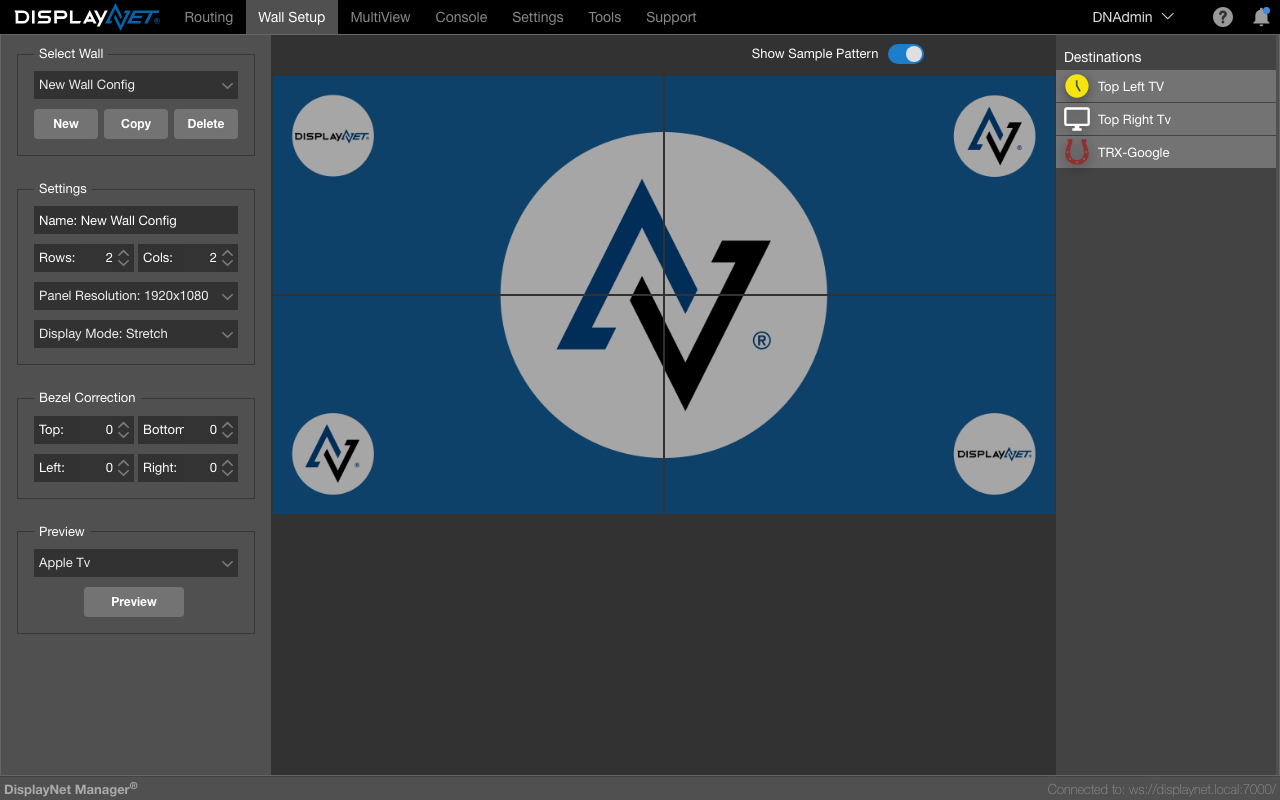
A new wall configuration using default values will be created and will appear in the Wall Preview to the right of the sidebar.
Editing a Wall
Select a wall from the Select Wall dropdown at the top of the left sidebar. The selected wall configuration will be shown in the Wall Preview panel to the right of the sidebar.
Make desired changes to the wall configuration.
Changing the wall configuration name
To change the name of the wall, click the input field and type a new name. Click away from the input field to trigger the name change save.
Changing the number of rows and columns
To change the number of rows and columns (1x1 up to 9x9) in the wall, click the up and down arrows in the "Rows" and "Columns" fields or enter the desired number of rows and columns in the input fields.
Changing the panel resolution
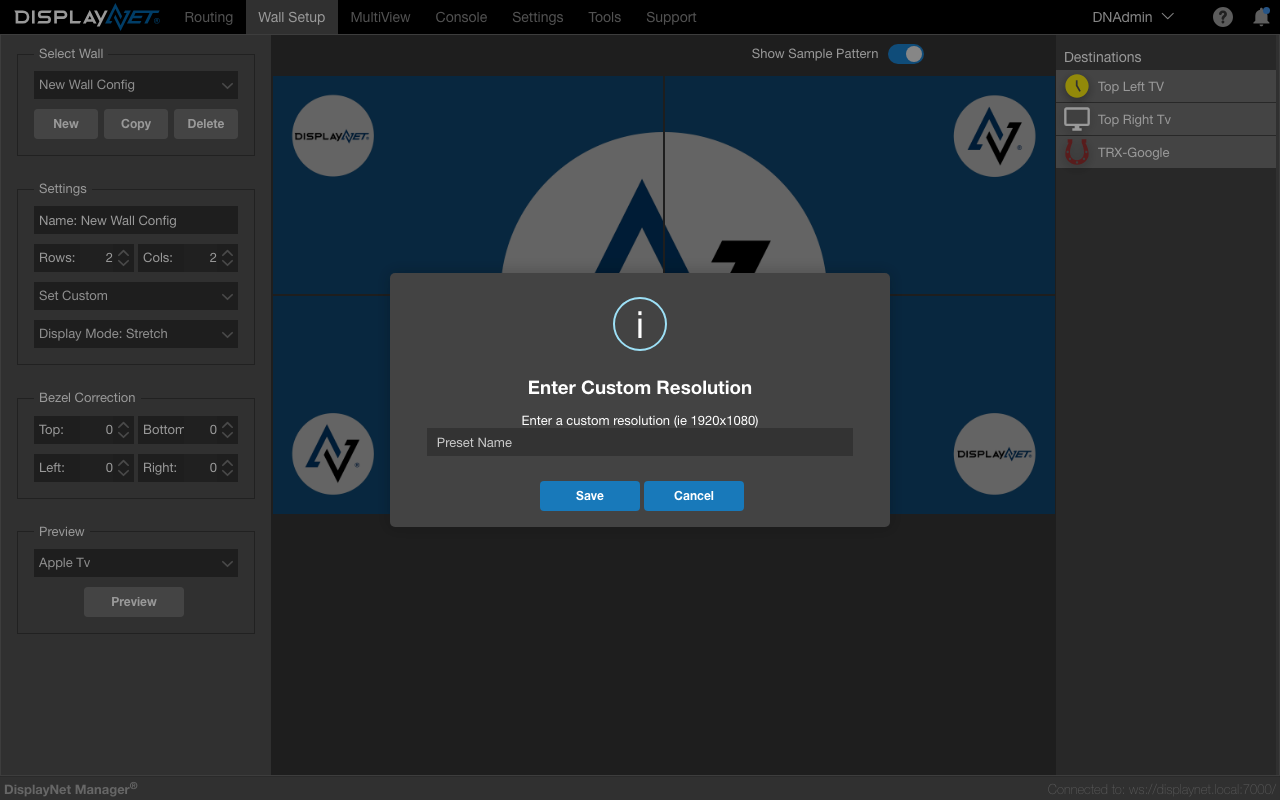
To change the panel resolution click the dropdown and select one of the options. (3840x2160, 1920x1200, 1920x1080, 1280x720 or define your own by selecting the "Set Custom" option)
Entering a custom resolution
- To enter a custom resolution, select "Set Custom" from the resolution dropdown menu.
- Enter the desired resolution in the input fields. (width x height, in pixels i.e., 1920x1080)
- Click the "Save" button to apply the changes.
Changing the bezel compensation values
The changing bezel compensation values has its own section.
Changing the wall display mode
Changing the wall display mode has its own section.
Changing the assigned devices
To assign displays to positions in the wall, drag them from the Device List on the right-hand side of the screen to the appropriate position in the Wall Preview. Displays may also be assigned by right clicking the wall position and clicking "Select Destination". Each wall position will show a label with its assigned receiving unit, otherwise the position will have no label and will appear darkened. .Assigned devices are shown in blue in the device list.
- Changing the assigned devices (drag and drop destination devices from the Destinations located in the right sidebar to the desired position in the Wall Preview)
Destinations may only occupy a single wall slot. To move a receiver to another location, drag the device’s label to the desired location. The destination device will be removed from any previous assignment and will be reassigned to the new location. Right-clicking a wall position displays a context menu with the following options:
- Remove Assignment - Removes the device from the wall position
- Select Destination - Opens a dialog to select a destination device for this position
- Device Settings - Opens the Device Settings panel for the assigned device
To remove a device from a wall, select "Remove Assignment" from the context menu, or drag the label away from the wall.
Saving Changes to a Wall
Any time a change is made to a wall, an "Unsaved Changes" indicator will appear, and the "Save Changes" button will appear.
- To save the changes, click the "Save Changes" button. The wall configuration will be updated and saved on DisplayNet Server. The changes will be reflected in the Routing Tab.
- To discard the changes, click the "Undo Changes" button and the wall will revert to the last saved state.

In order for changes to be applied, the source must be re-joined to the wall.
Copying a Wall
- To copy a wall, select the wall from the "Select Wall" dropdown menu. The wall configuration will be shown in the Wall Preview.
- Click the "Copy" button in the upper left part of the left sidebar. A new wall configuration will be created using the same settings as the original wall. The new wall configuration will be shown in the Wall Preview.
Deleting a Wall
Unlike other destinations, a video wall cannot be removed using the Routing Tab. Instead, to delete a wall configuration, navigate to Wall Setup Tab. Select the wall from the dropdown and click "Delete." The wall configuration will be deleted from the library and will no longer be available in the Routing Tab.
To delete a wall configuration, navigate to Wall Setup Tab. Select the wall from the dropdown and click "Delete." The wall configuration will be deleted from the library and will no longer be available in the Routing Tab.
Previewing a Wall
To preview a wall configuration:
- In the "Preview" section near the bottom of the left sidebar, select the wall from the "Select Wall" dropdown menu.
- Select the source from the dropdown to route to the selected wall in the "Preview" section.
- Click the "Preview" button.

The wall configuration will be routed to the source selected.
Wall configurations and system preset snapshots are managed independently. When a wall configuration is created, it's stored in the DisplayNet Server's library of walls. On the other hand, saving a snapshot in the Preset Manager captures the current system configuration, including all device joins.